Comic Translation Lettering Tutorial
This is a short guide to lettering a translation of a comic reusing the original speech bubbles and utilising open source software.
The starting point is a scan of the original page and a script. You'll also need a working knowlege of both the GIMP and Inkscape. [1] I'd also recommend a graphics tablet - you won't go far wrong with a Wacom A5 and it won't be too expensive.
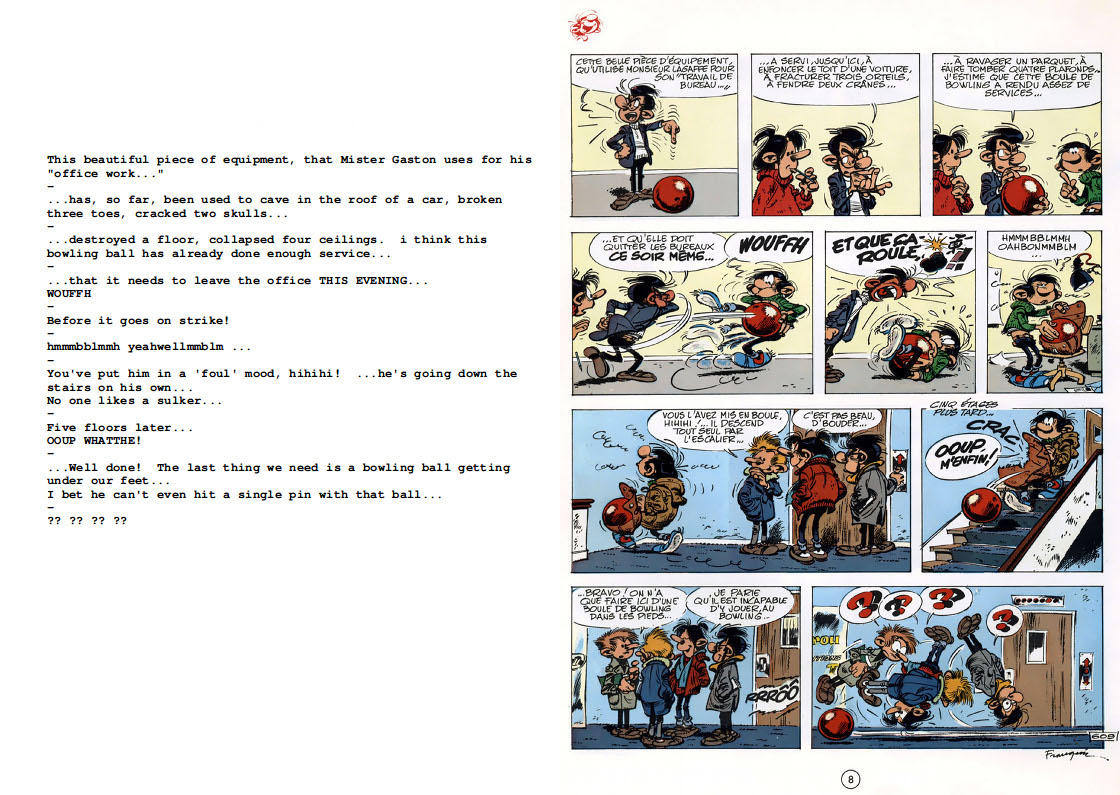
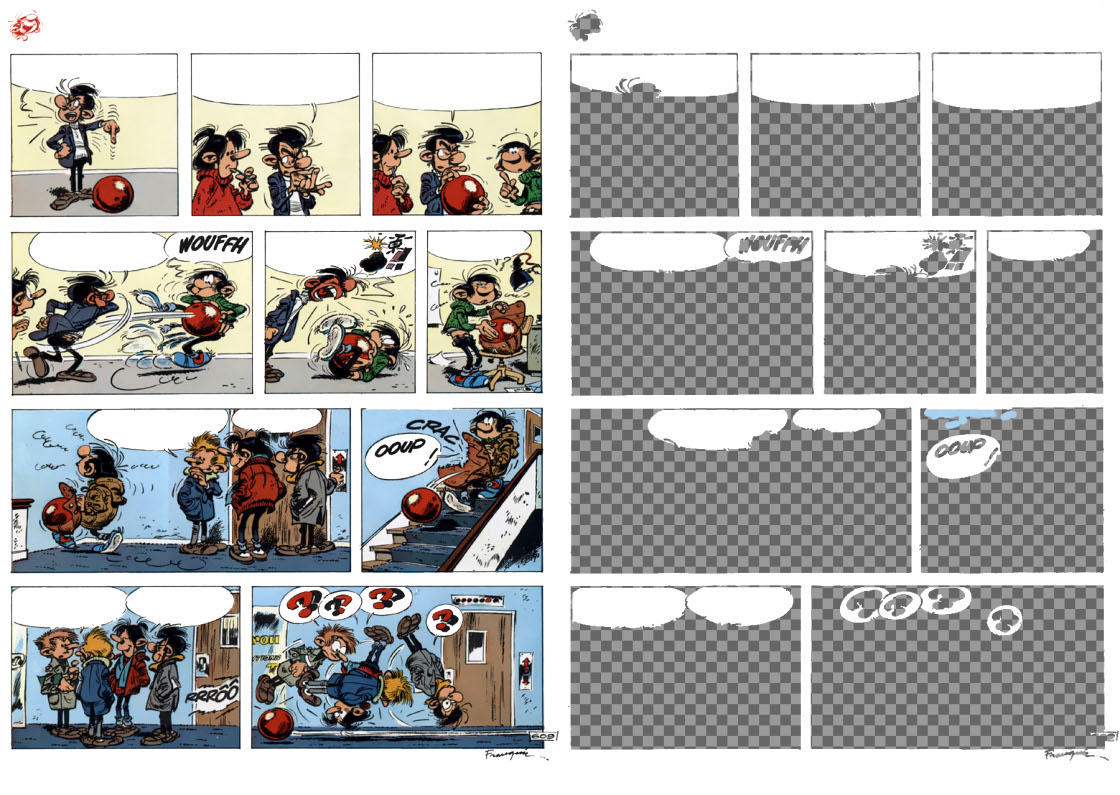
Open the scan up in the GIMP, save it as a native GIMP image (.xcf) before making sure you are happy with the alignment and size the image to the final required dimensions. Now add a new layer which will be used to mask out the speech balloons and gutters leaving the original intact as a reference. Generally - as in this example - the backgrounds are white, in which case it's best to use pure white, but if there are other colours as the gutter and speech bubbles then use the eyedropper with a radius of 3-5 pixels to pick the background colour. Use this colour to mask the text in the speech bubbles - this is where the graphics tablet really comes into its own - and then use the magic wand to select the whole of the bubble before filling this area. Make sure you turn off the visibility of the background layer from time to time to check the mask is confined to the areas you want - sometimes it can 'spill' through to areas of similar colour in the artwork, this can be tidied up using the eraser tool on the mask layer. Use the same process with the gutters and page background and you should be left with the masked page ready for lettering:
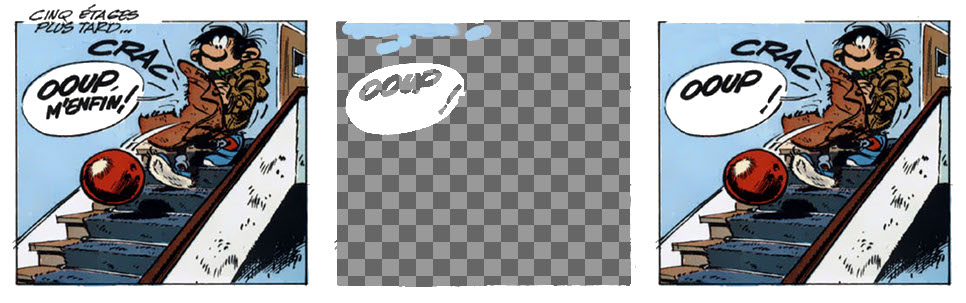
Sometimes you will have to deal with text that covers the art. For these it is best to use the clone and blur tools to create an area on the mask that matches and blend into the surrounding art. Don't worry if it's not a perfect match as the text over the top will take the attention and obscure the details:
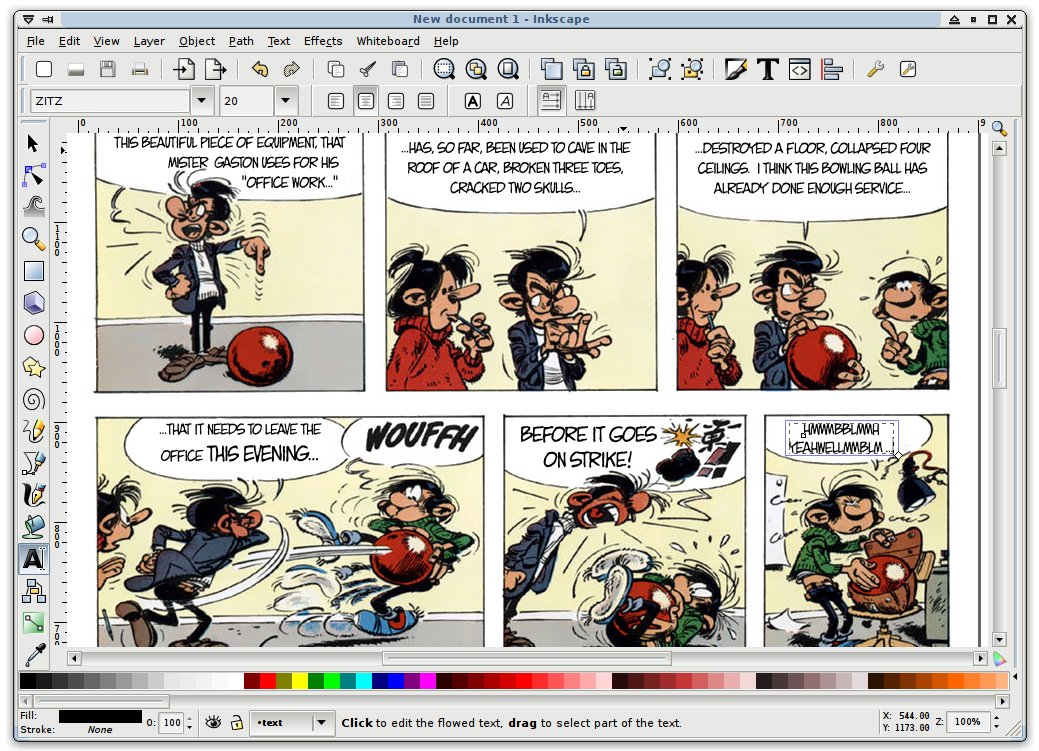
Now we have the page ready for lettering save a copy as a jpg and move over to Inkscape. Create a new document and import the jpg you have just saved. Open the 'Image Properties' dialogue from the file menu and fit the page to the selection. Now lock the base layer containing the image and add a new layer for the text. Switch to this layer and start adding the text - Inkscape is pretty good at handling flowed text so generally there isn't much adjusting required to get the text to fit the bubbles. However, sometimes you will need to play around with line breaks and even change, add or remove words to get them to fit. It is much easier to get things to fit at this stage if you've got a bigger image as the text can be - relatively - smaller and still be legible. Whatever you do, don't use Comic Sans: regardless of how good your work is, using Comic Sans will make it look rubbish.
Once the lettering is finished, turn off the visibility of the image layer and export the drawing as a bitmap. This will create a transparent png with just the lettering:

This can now be imported back into the GIMP as a new layer and the final image can be exported as a jpg:

Resources
- DC Comics Guide to Coloring and Lettering Comics - Covers all the main techniques.
- Comic Book Lettering the Comicraft Way - Good combination of style and techniques, a must own if you are interested in lettering.
- Making Comics - A great comic covering just about everything you wanted to know about how to make your own comics. There's also an online section specifically about online comics.
- Creating Comics in Inkscape - A good set of videos.
- Free comic fonts - Comic Sans is evil, mmm kay! It kills kittens.
- How D'Israeli drew The Vort - Inspiration for how to approach this article.
Footnotes
[1] The tools normally recommended for comic creation are Abobe Photoshop and Illustrator. However, if you obtain legitimate copies of these you won't get much change from €2000! In terms of what I'm outlining here, GIMP and Inkscape have more than enough functionality.